Heat transfer vinyl is a specialty vinyl material that is used to decorate or personalize T-shirts, garments, and other fabric items. HTV contains a heat-activated adhesive backing, which allows the vinyl to permanently transfer to your garment when heat pressed with sufficient time, temperature, and pressure.
By using a vinyl cutter, you can cut digital designs into the vinyl and then transfer those designs onto your T-shirt or garment using a heat press. The result is impressive, high-quality custom garments with exceptional durability as well as look and feel.
One of the great things about heat press vinyl is that there are so many different varieties of colors and finishes – glossy, matte, flock, stretchy, glow-in-the-dark, glitter HTV – you name it! No matter what project you’ve got, there is an HTV that’s perfect for it. Auplex can supply all of this!
What Equipment Do I Need to Get Started?
One of the biggest benefits of creating custom garments with heat transfer vinyl is that it carries one of the lowest startup costs. This is because the two main pieces of equipment that you need are a vinyl cutter and a heat press.
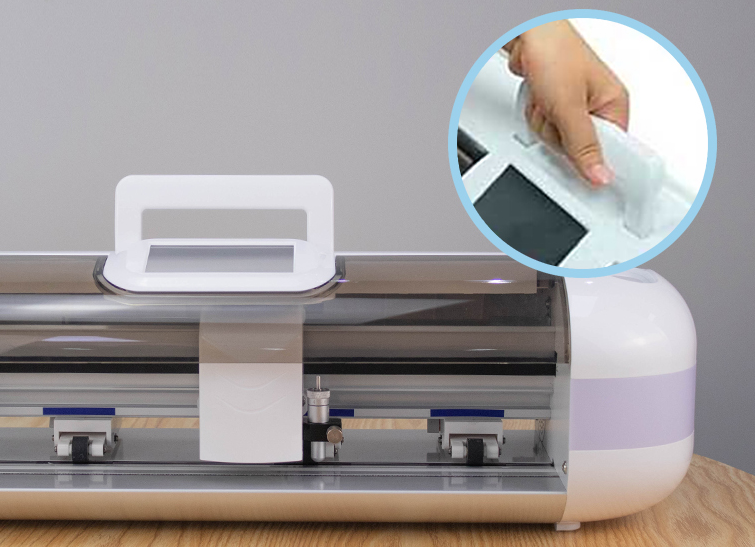
1. Vinyl Cutter
There are a lot of vinyl cutting machines on the market in a variety of sizes to accommodate all levels of production needs. For starting out, we recommend going with a desktop vinyl cutter such as the AP380 and AP300. Both cutters are very modestly priced and are the perfect entry point into the world of garment decoration. Once your business starts ramping up, and you need faster speeds to keep up with demand, you can start looking at a Automatic Contour Cutter such as the AAB series.
2. Heat Press
The second piece of equipment you need is a heat press. A heat press works by effectively sandwiching your HTV and your garment together while applying heat. This allows the vinyl to become a permanent part of your fabric.
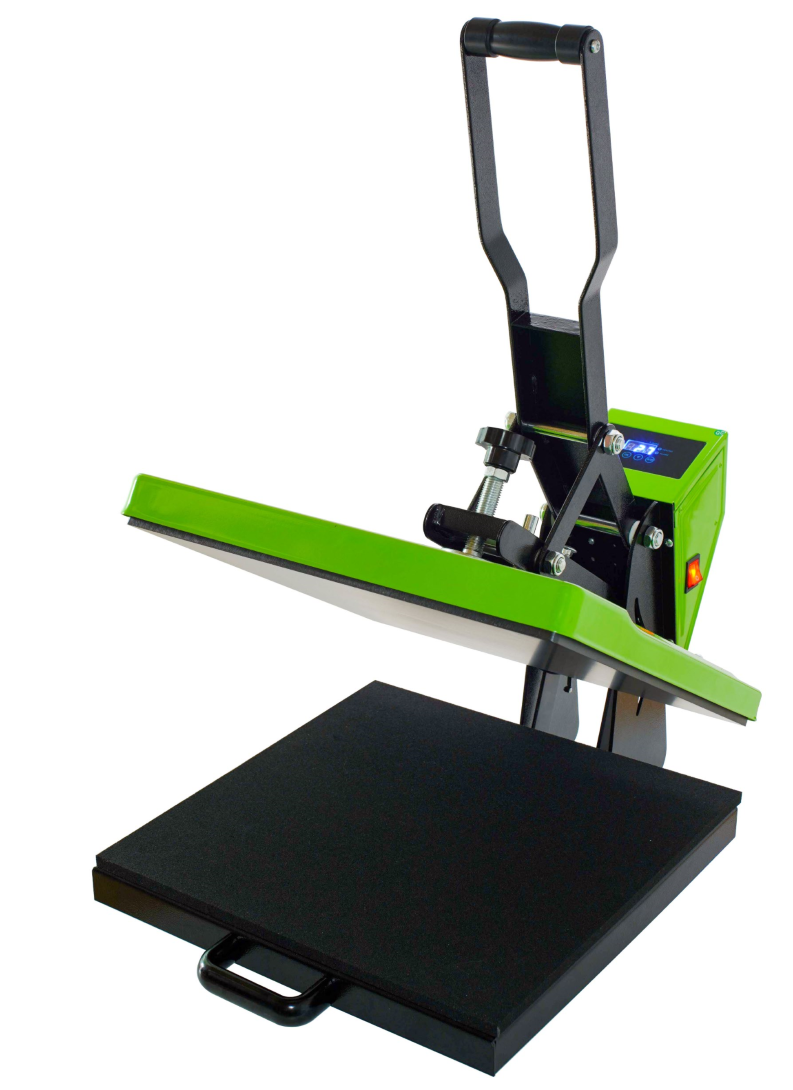
As with vinyl cutters, there are a lot of heat presses on the market, and you can become quickly overwhelmed with all of the options. The main thing to look at is the size of the press. The industry standard heat press size is 16” x 20”, and this will allow you to do almost anything. This also future proofs your business in case you want to transfer larger designs. However, if the budget does not allow for a 16” x 20” just yet, you can start as small as a 9” x 12” press on up!
Great! Do I Need Anything Else?
Once you’ve picked up your vinyl cutter and heat press, you’re almost ready to go! The last things you need are your supplies. Let’s go through each of them.
1. Heat Transfer Vinyl
2. T-Shirts/Garments
3. Weeding Tool
A weeding tool is going to become your absolute best friend. When you’re working with heat transfer vinyl, one of the steps after cutting is to weed away excess vinyl. While you can remove larger portions by hand, you’ll find that a weeding tool is extremely useful if not essential for removing those smaller pieces.
4. Teflon Cover Sheet
A Teflon cover sheet is necessary when you go to press your transfer. This cover sheet protects your garments from direct heat and prevents them from being singed or scorched. It also is very useful when layering vinyl, which requires multiple presses, and prevents the vinyl from inadvertently melting.
5. Design Software
Your cutter will come with its own design software that you can use to create designs and cut files. You can also use more sophisticated programs like Adobe Photoshop, Illustrator, and CorelDRAW if you need additional flexibility and customization.
How to Use Heat Transfer Vinyl to Create Your First Custom T-Shirt
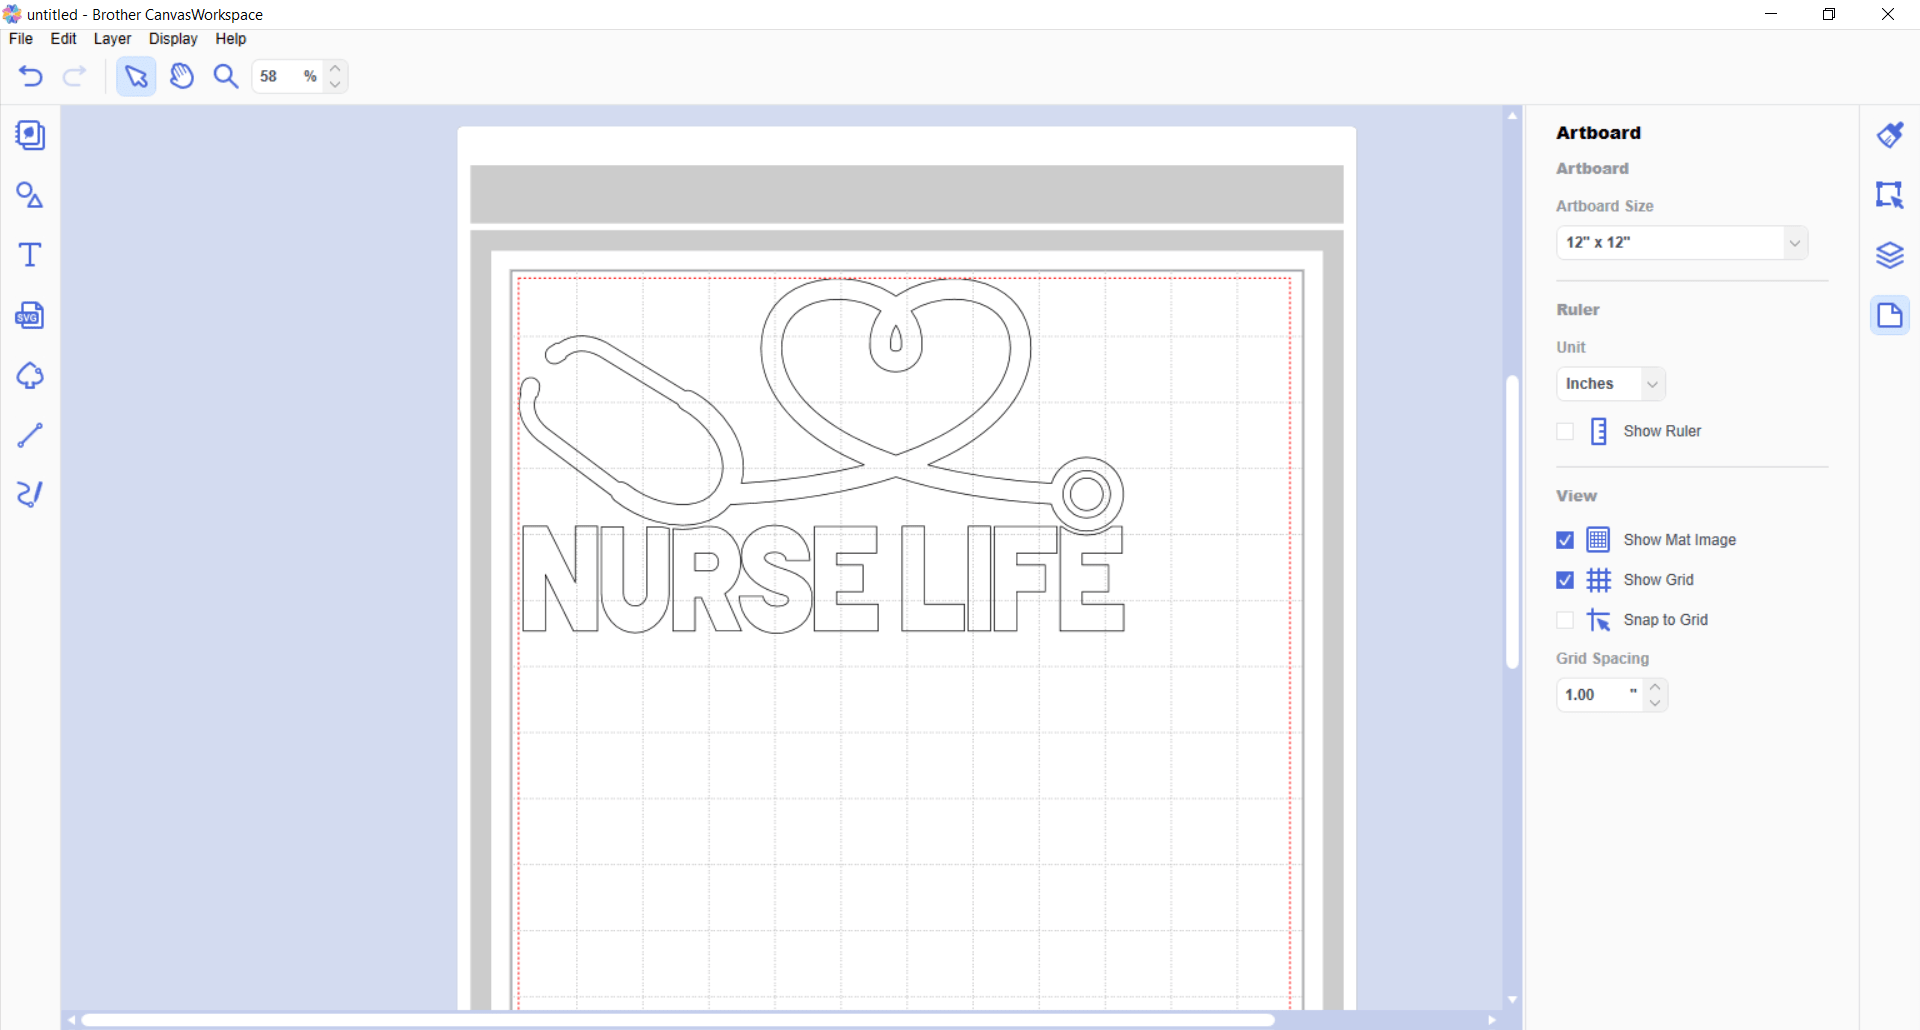
Step 1: Design Your Cut File
Once you’ve got all of your supplies, and your vinyl cutter and heat press are set up, you will want to create a design on your computer to cut into the vinyl (also known as a cut file). The easiest way to do this is by using the software that comes with your vinyl cutter such as Signmaster
make sure your image is mirrored (reversed horizontally). Because you’re cutting the backside of the heat transfer vinyl, your design needs to be mirrored. When you go to press it, it will be facing the correct way.
Step 2: Load Your Vinyl Cutter & Set Cut Settings
Once your cut file is ready, it’s time to load your vinyl cutter up with your favorite HTV. Now, if this is your first time handling heat transfer vinyl, you’ll want to pay attention to a couple of things.
First, you’ll notice that your HTV has both a shiny side and a dull/muted side. The shiny side of the vinyl material is the carrier. The plastic-y carrier holds the heat transfer vinyl pieces in place during application to ensure the cut design is aligned correctly. The opposite side, which has a muted color, is the adhesive side of the HTV material, and this will be the side that will end up receiving the cut. It will also be the side that touches the garment when you go to press it. With that in mind, you will want to load your vinyl cutter with the carrier side face-down. Remember, you’re cutting on the adhesive side.
Next, make sure your cutter is set to the correct settings for that particular vinyl. Because there are a lot of different HTVs on the market, with varying thicknesses, you will want to adjust your cut settings accordingly. Some vinyl requires more “force” than others. Too much force and you can end up cutting through the plastic carrier. Too little, and you won’t be able to properly weed away excess vinyl.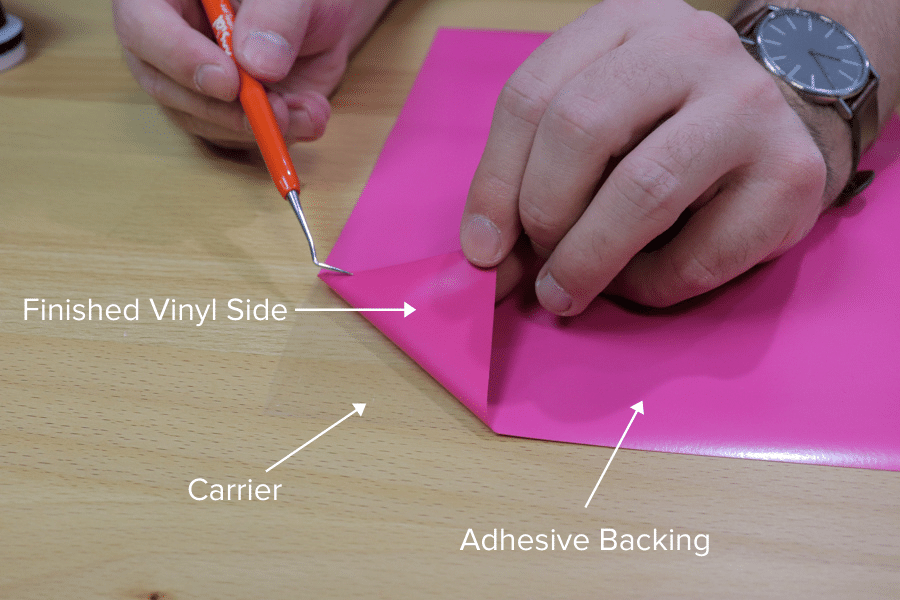
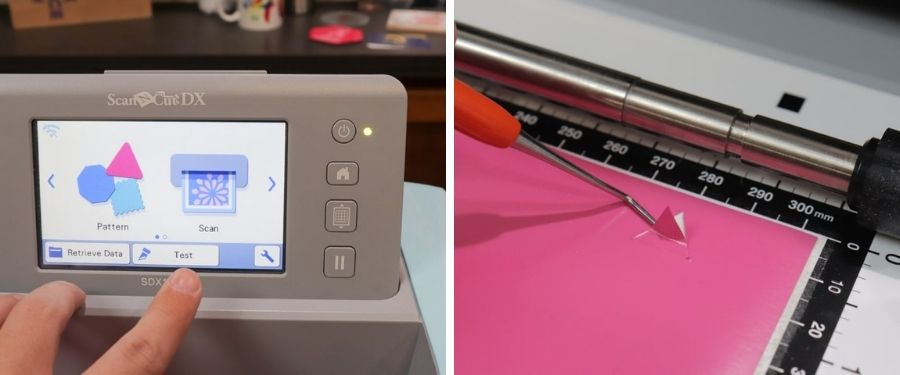
Step 3: Run a Test Cu
When your HTV is loaded, and you have input your cut settings, run a test cut before you cut your entire design. A test cut is generally a small square or triangle in your vinyl, and this will allow you to see if you need to make any last-minute changes to your cut settings prior to cutting. It’s a small amount of effort that can save you a lot of money and hassle – there’s nothing worse than cutting an entire design only to have the cutter not fully cut through the vinyl (or cut through the carrier!).
Step 4: Cut Your Vinyl
Alright, the big moment has finally arrived! It’s time to send your design to the cutter and let it work its magic.

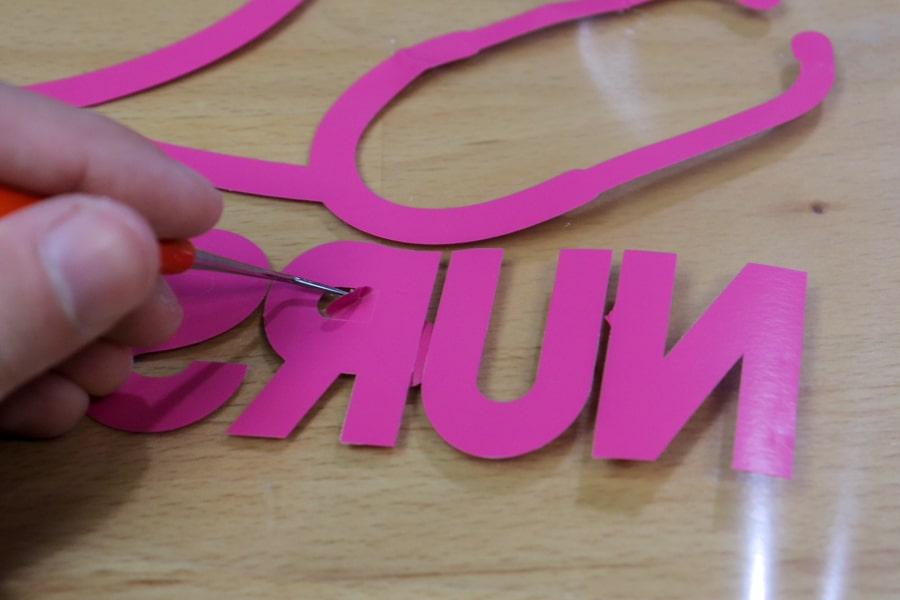
Step 5: Weed Away Excess Vinyl
After your design has been cut, it’s time to remove the excess vinyl that’s not apart of your cut design. This is commonly known as weeding. You can start by peeling the excess HTV from the carrier by hand, but you’ll likely want a weeding tool on-hand to help remove the small and intricate pieces.
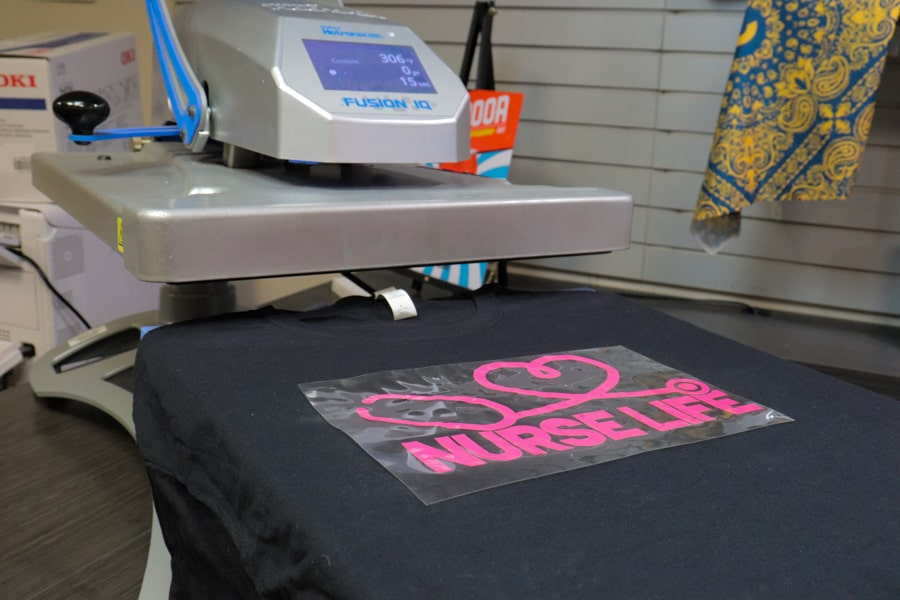
Step 6: Heat Press the HTV to Your Garment
Once all of the unnecessary vinyl has been removed, you’re ready to heat press your design to your garment!
To do this, first load your T-shirt onto your heat press’s bottom platen. Then, align and place your transfer on top of the shirt and cover with a sheet of Teflon. Your transfer should now be facing the correct direction (no longer mirrored).
Next, press your transfer onto the shirt using the recommended press settings for your vinyl. For instance 305°F for 10-15 seconds with medium pressure.
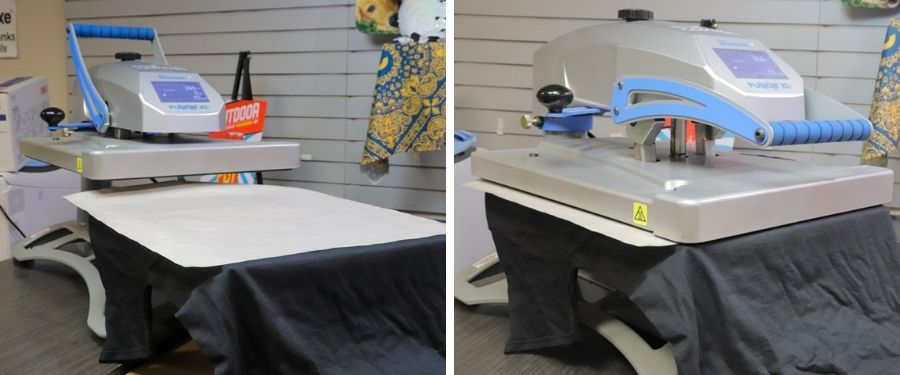
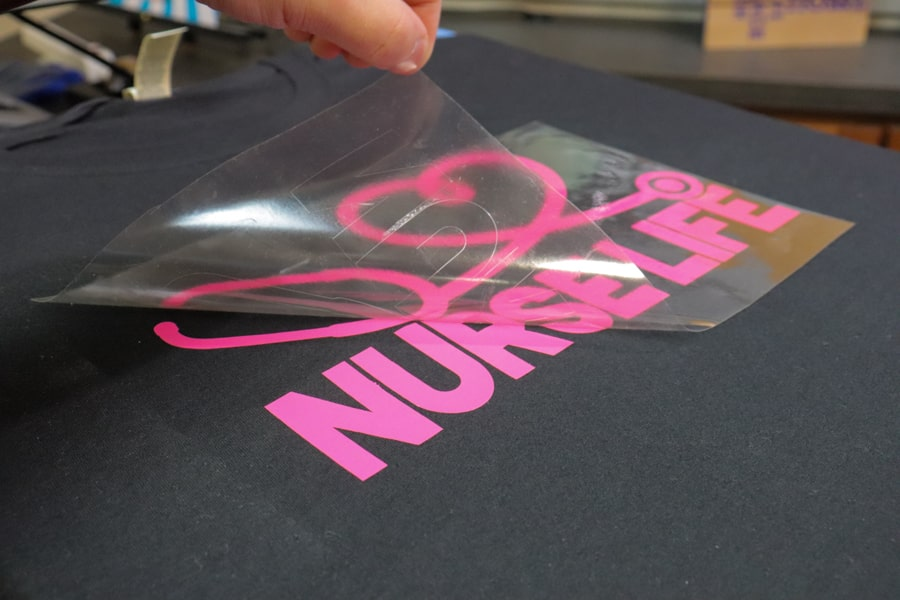
After your timer goes off, pop open the heat press, peel the plastic carrier from the garment, and your vinyl has successfully adhered to the garment! Congrats! You have a new custom T-shirt.

Post time: Sep-13-2022